
Thursday, December 30, 2010
soon to come....
Tomorrow is big day for us here at color2alpha ,we will be releasing 4 tutorials ,i know "wow..." but not just the basic stuff like placing GBR files .Bigger and cooler than any of that stuff .we will be making a tut on how to color your hand drawn scanned in images ,the easy way something i had to come up with myself ,because ive yet to find a tutorial explaining how to do so. so thats one of our exclusive tuts being featured tomorrow. number 2 will be my vector sunset that will surely show off you new found gimp skills ,also including a how to on how to make a vector night sky .number three for you iphone and ipod touch owners a tut on how to make your web 2.0 kinda wallpaper .number 4 is a....special new thing im still working out the kinks on but it will be great for all. :) so ctrl+d and enjoy the site .please take the time to like our facebook page and retweet us with the lil gadget under the resources box , thanks for you time we appreciate it :)
Wednesday, December 29, 2010
How to add Fonts to Gimp in Windows!!
First Download the fonts from one of the Links on the side Dafont.
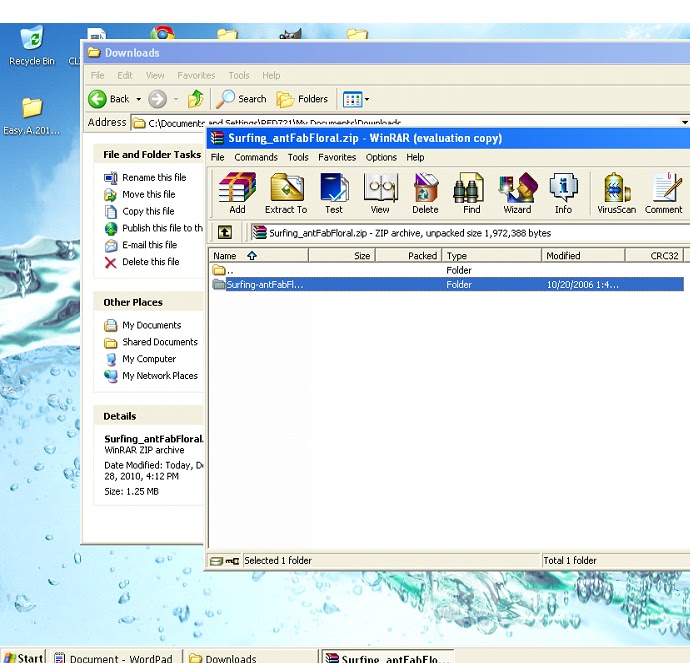
1. Go to Start/My Documents/Downloads folder and look for the
zip folder that you download ,
Double click on that it would look like this shown on the image below.
 2. Drag the font to your Desktop or extract it to your
Desktop how ever you want, it should look like
that like the image below.
 3. After you've done that go to the Start menu/ Control Panel.
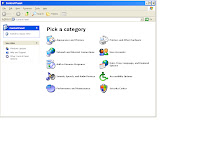 4. Click on Appearances and themes.
 5. When your on Appearances and Themes
on the side where it says "see also"
you should see the fonts folder double click on it.
 6. Since you font file is on your Desktop
click on it and drag it to the fonts folder
it save automatically and just close it. :)


1. Go to Start/My Documents/Downloads folder and look for the
zip folder that you download ,
Double click on that it would look like this shown on the image below.

Desktop how ever you want, it should look like
that like the image below.


on the side where it says "see also"
you should see the fonts folder double click on it.

click on it and drag it to the fonts folder
it save automatically and just close it. :)

7.and you could go ahead and open up gimp to make sure its there
and there you go thats how my text looks
thank you bookmark and enjoy!!!!

the resources available through us :)
1. Dafont - is a font site with every font you could possibly want, the is based on being free everything there is free and no signup required ,will we feature a tutorial on how to place these fonts into linux,and windows later to day :) and how to use them with gimp to create great artwork based around letters. Which later will have a tutorial for
2. Get paid - link is for you who have your own blog and want to make some extra money by placing a small banner or large one ,on your site ,for every click you get a drop in the bucket after you gain 150 bucks you can choose the option of them sending a check to your house or a direct deposit to your paypal ,so give it click and see what you could be making with no effort :) and for every one you refer you get 70 bucks :) so click it for us please
3. Gimp brushes - is a link to search from the site deviant art and it has about 8000 brush packs to choose from .will be featuring a tutorial on how to make your own brushes through gimp or with a hand drawn picture and a scanner.
4. Gimpology- is a great free tutorial site with alot of content ,its the first place we go after finishing a tutorial here, we will post our links there to get some extra views and to spread the word about our new site :) o if you have a moment to spare ,go to our new facebook page and like it please =<^-^>=
5. Stock.xchng - is probably our best resource because that is the site where you can get the best free stock images out there just signup and bam you can download some of the biggest stock photos out there ,perfect for our upcoming photo manipulation tutorials :)
6. The Gimp - last but never least is the program gimp it is the tool in witch you can do all these wonderful things in so if your new to the gimp scene go there first and get it :) thank for taking some of your time to read this ,now go gimp it up :)
Tuesday, December 28, 2010
How to add gbr files to gimp in windows...
This is a tutorial for extracting and placing a .gbr files into gimp.. (gbr=gimp brushes)
You can downloads the brushes from one of the links on the side ===>
1. Go to Start and Documents

you downloaded, Double click on it.
 4. It should look like this...if you have
winrar..
 5.You could extract it to you Desktop
or you could highlight it and drag it to your
desktop thats what i did..
 6.as you can see..
 7.After that go to Start again
and click on my computer
 8. Go to system (c:) double click
 9. Go to Program Files
 10. look for gimp 2.0 file click on it
 11. go to the share folder
 12. Double Click on the Gimp folder
 13. click on the 2.0 folder
 14. you will see the brushes folder
double click that..
 15. Highlight that gimp brushes
that are in you Desktop,
and drag then into the brushes folder.


You can downloads the brushes from one of the links on the side ===>
1. Go to Start and Documents

2.Click on Documents and go to your downloads folder
.
3.When your at your downloads folder look for the zip file
you downloaded, Double click on it.

winrar..
or you could highlight it and drag it to your
desktop thats what i did..


and click on my computer


double click that..

that are in you Desktop,
and drag then into the brushes folder.

16. As you can see the brushes are in the folder
close the folder and just go to gimp..

And there you go.. Enjoy and have fun!!!
How to place gbr files in Linux
this is tutorial for extracting and placing .gbr files into gimp (gbr=gimp brush )
1.download brushes from one of the links on the side ==>
2.find the zip file in your downloads
3.open the zip file

 3. after you extract the folder ,click on it and select all and copy them.

 4.after you copy them go to your home folder and press ctrl+h to un hide hidden folders
 4. find the gimp 2.6 folder and open it, then paste the gbr files you copied to the brush folder in the gimp 2.6 directory .


5. open gimp and bam :) enjoy your new brushes
1.download brushes from one of the links on the side ==>
2.find the zip file in your downloads
3.open the zip file


5. open gimp and bam :) enjoy your new brushes


