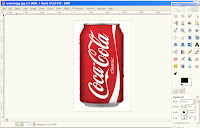
Note: I Apologize for all of this writing the thing is that i have 66 screenshots of this tutorial and i didn't want our site to load slow, the rest of the screenshots would be uploaded to Media Fire once again i Apologize for the inconvenience and i hope that you really join my tutorial thank you.
Choose a photo of your choice
Go to File/open as layer and select your photo
(make sure that u saved your photo in your desktop
it would make it muck easier for you)
 |
- Go to File/New ( Size 800x600)
- Change your Foreground Color ( with the color of your choice)
- Go to your Bucket Fill tool and click on the middle of the layer.
- Go to Filter/Artistic/Apply Canvas and click ok.
- Go back to your Photo go to Edit/Copy
- And then go back to your new layer go to Edit/Paste (if your photo is to big scale it down)
- When you paste the Photo it would create a Floating selection click on the new layer and it would create a normal selection. (Name it as Right)
- Use the Lasso Tool.
- Click on the top of the photo drag it to the left stop right at the middle, drag it thru the middle and create curved lines not straight you want to have that tear effect to it. Click on the out side of the photo and click on the beginning point to close your selection.
- Go to Select/Distort and click ok.
- Now go to Select/Invert
- Go to Edit/Copy
- Then Edit/Paste
- It should create a floating selection again click on the layer and you would see the left side of the photo name it Left.
- Click on the eye to make it Invisible right click on the layer and go to Alpha to Selection and now you see you have your selection back.
- Go back to your right layer make the background color to white use the Bucket Fill Tool and make sure that its on Fill Whole Selection.
- Click on the left side of the layer and you will see the left side would turn white.
- Go back to your Lasso Tool make the same selection on the left side the same way as the right side make a line next to the torn part make sure that there is a space in between, click on the starting point to make the selection.
- Go to Select/Distort and click ok. if you think that your selection is to wide or you don't like how it looks Go to Select/Grow by 4 px. and click ok.
- Delete the white by Pressing DELETE on your Keyboard.
- Go to Select/None
- Do the same thing to the Left layer click on the eye to make the Photo Visible right click on the Left layer / Alpha to Selection.
- Then go to Select/Invert
- Go to your Bucket Fill Tool again using white make sure that u have Fill Whole Selection click on the Photo and now the right side should be white.
- Grab the Lasso Tool and do the same thing that you did earlier on the left side, click on the starting point to make a selection.
- Go to Select/Distort and press ok. (if you feel that your selection is to with or if you don't like it you could go to Select/Grow and grow by 7 or to what ever number you think is right for you) and click ok.
- Delete the white by pressing the DELETE button on your Keyboard.
- Now go to Select/None
- Go to your Move tool and move the left photo up or down however you like and do the same thing to the right photo ( just make sure there is a distance between them)
- Then go to your Rotate Tool and on your layer dialog click on the left photo and rotate to 7.98 angel and click rotate, do the same thing to the right photo but this time rotate it to 8.40 angel and click rotate.
- Go back to your move tool and move it how you want it to be.
- Go to your left layer and right click on it and Merge Down.
- THE FINAL STEP go to Filter/Light and Shadow/Drop Shadow
offset x: 5
offset y: 5
Blur radius: 10
Color: Black
Opacity: 80
Allow resizing: if it has a check un-check if it doesn't leave it as it is. |
How to tear up a Photo with Gimp


0 comments:
Post a Comment